
A sitemap is a file that provides search engines with a map of your website’s pages, posts, and other types of content. It helps search engines to better understand the structure and content of your website, which can lead to improved indexing and search engine rankings.
In this article, we will see an easier step-by-step process to create a sitemap for your website. And we will also learn how to link it to Google Search Console for better website optimization. But before going forward we will understand what is WordPress sitemap. We will understand the differences between an XML and HTML sitemap and how both of them help optimize a site.
Table of contents
What Is a WordPress Sitemap
In WordPress, a sitemap is typically generated automatically by a plugin or by WordPress itself. The sitemap file is usually located at yourwebsite.com/sitemap.xml and can be accessed by search engines like Google.
A WordPress sitemap contains information about each page and posts on your website, including the URL, the last time it was modified, and the priority of the page or post. This information can help search engines understand the importance and relevance of each page and post on your website.
Having a sitemap is important for SEO, as it helps to ensure that all of your website’s pages and posts are indexed by search engines. It also helps to ensure that your website is crawled regularly by search engines, which can lead to improved search engine rankings and increased traffic to your website.
Overall, a WordPress sitemap is an important tool for improving the SEO of your website. By ensuring that your website’s content is properly indexed and crawled by search engines, you can increase your website’s visibility and reach more potential customers online.
Differences between an HTML and an XML sitemap and how both of them help to improve site optimization.
Sitemaps are an important aspect of website optimization, and they come in different formats, including HTML and XML sitemaps. Both of these formats serve different purposes, and understanding their differences can help you optimize your website more effectively.
HTML Sitemaps
HTML sitemaps is a page on your website that lists all of the links to your website’s pages and posts. It is designed to help visitors navigate your website and find the content they are looking for. HTML sitemaps are generally organized into some categories and subcategories, making it easy for site visitors to find the content they need.
From an SEO perspective, HTML sitemaps are helpful because they make it easier for search engines to crawl and index your website’s content. They provide search engines with a clear and organized map of your website’s pages and posts, which can help to improve your website’s search engine rankings.
XML Sitemaps
XML sitemaps are different from HTML sitemaps in that they are designed specifically for search engines. They are essentially a file that lists all of the pages and posts on your website, along with important metadata such as the date the page was last updated and the priority of the page.
XML sitemaps are useful because they make it easier for search engines to crawl and index your website’s content. They provide search engines with a clear and concise map of your website’s pages and posts, which can help to improve your website’s search engine rankings. Additionally, XML sitemaps can help search engines discover new pages on your website more quickly, which can help to improve your website’s visibility in search results.
Key Differences Between HTML and XML Sitemaps
The main differences between HTML and XML sitemaps are:
Purpose: HTML sitemaps are designed to help visitors navigate your website, while XML sitemaps are designed to help search engines crawl and index your website’s content.
Format: HTML sitemaps are in the form of an HTML page, while XML sitemaps are in the form of an XML file.
Metadata: XML sitemaps include important metadata such as the date the page was last updated and the priority of the page, while HTML sitemaps do not include this information.
Both HTML and XML sitemaps are important for website optimization, but they serve different purposes. HTML sitemaps are designed to help visitors navigate your website, while XML sitemaps are designed to help search engines crawl and index your website’s content. By using both types of sitemaps, you can improve your website’s visibility in search results and provide a better user experience for your visitors.
Steps to create XML Sitemaps through Yoast Plugins
Creating an XML sitemap for your WordPress website can seem like a daunting task, but it’s actually quite simple with the help of a plugin like Yoast. In this article, we’ll walk you through the steps to create XML sitemaps using Yoast SEO plugin.
Step 1: Install and then activate Yoast SEO Plugin
If you haven’t already, you’ll need to install and activate the Yoast SEO plugin. This can be done by going to your WordPress dashboard, clicking on “Plugins,” and then “Add New.” From there, you can search for “Yoast SEO,” install and activate the plugin.
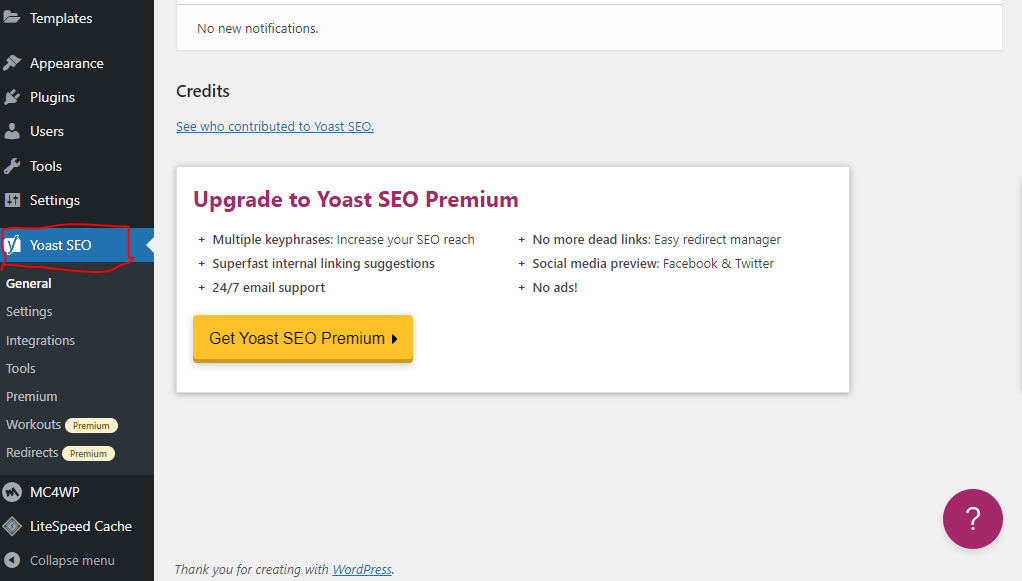
Step 2: Find Setting XML Sitemaps
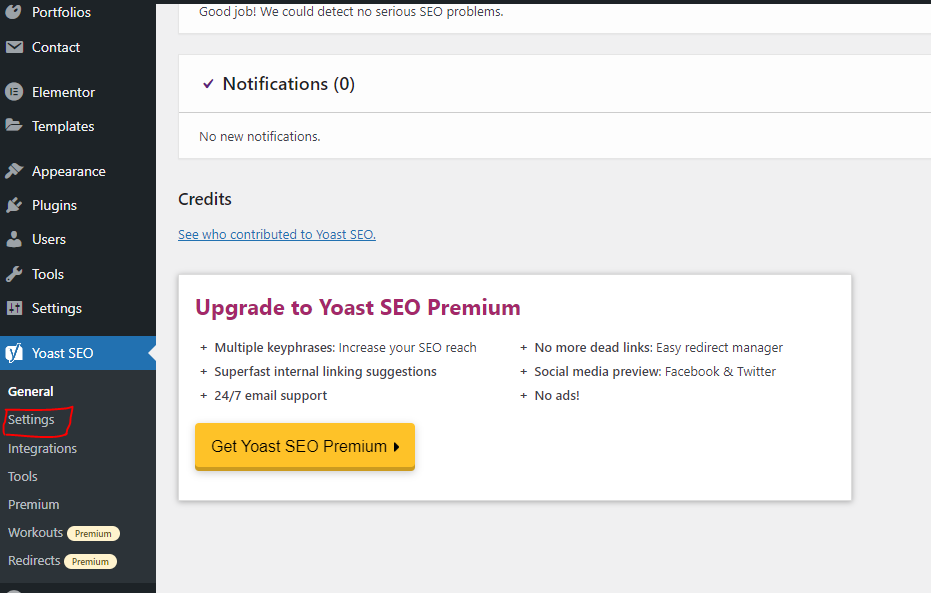
Once you’ve activated the Yoast SEO plugin, you’ll need to enable XML sitemaps. To do this, go to the Yoast SEO settings page by clicking on “Yoast SEO” in the WordPress dashboard, and then “General.” From there, click on the “Site Features” tab, and scroll down on the “XML sitemaps” option.
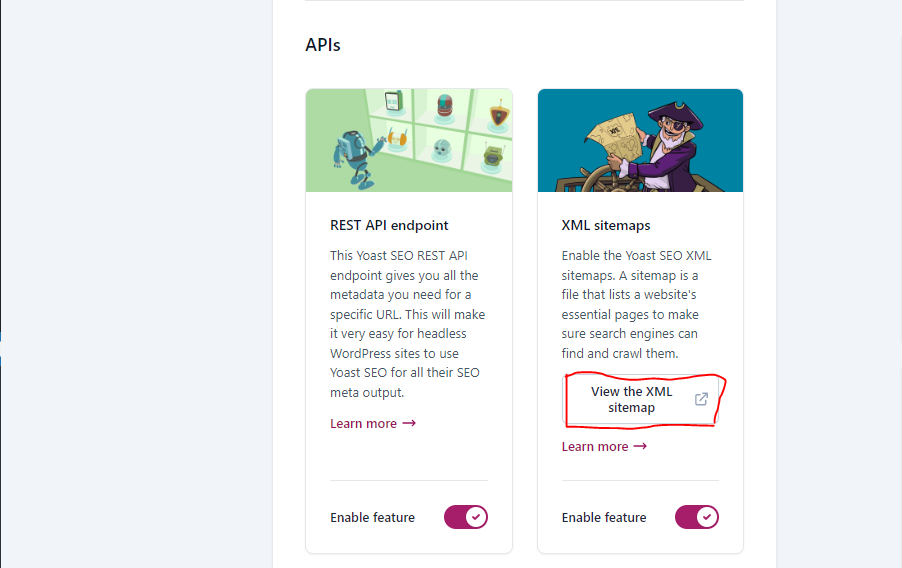
Step 4: Scroll Down and Enable

In the newly updated Yoast SEO plugin you will see many options. To find the XML sitemap, just scroll a bit down. Under APIs, you can see sitemaps link and then enable XML sitemaps
Step 5: Customize Your XML Sitemap
After enabling XML sitemaps, Yoast SEO will automatically create a sitemap for your website. However, you can customize the sitemap by going to the “XML Sitemaps” tab under the “SEO” section of the WordPress dashboard. Here, you can choose which post types to include in the sitemap and adjust other settings as needed.
Step 4: Submit Your XML Sitemap to Search Engines
Once you’ve created your XML sitemap, it’s important to submit it to search engines like Google and Bing. This can be done by logging into your search engine’s webmaster tools, and then submit your sitemap URL. Yoast SEO also has a built-in feature that allows you to submit your sitemap directly to Google.
Simple Steps to add website’s Sitemap to Google Search Console
Google Search Console is a valuable tool for website owners who want to monitor their site’s performance in search results. One important aspect of optimizing your website for search engines is submitting a sitemap to Google Search Console. In this article, we’ll walk you through the steps to add your website’s sitemap to Google Search Console.
Step 1: Verify Your Website
Before you can add your sitemap to Google Search Console, you’ll need to verify that you own the website. This can be done by following the verification steps provided by Google Search Console. You can verify your website by adding a code snippet to your website’s header or by uploading an HTML file to your website’s root directory.
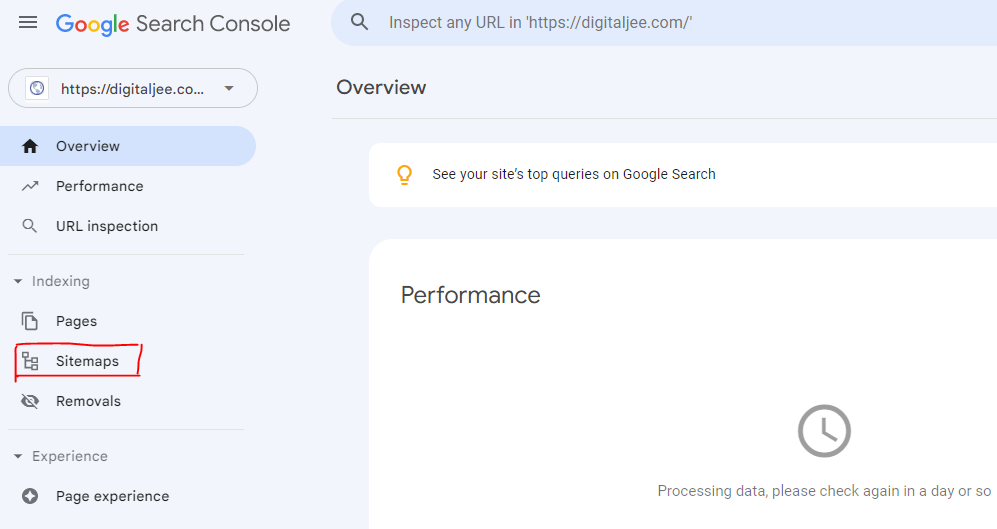
Step 2: Access Your Google Search Console Account
Once your website is verified, log in to your Google Search Console account. On the left menu table you will sitemap option, click on that to put your URL.
Step 3: Find Your Sitemap URL
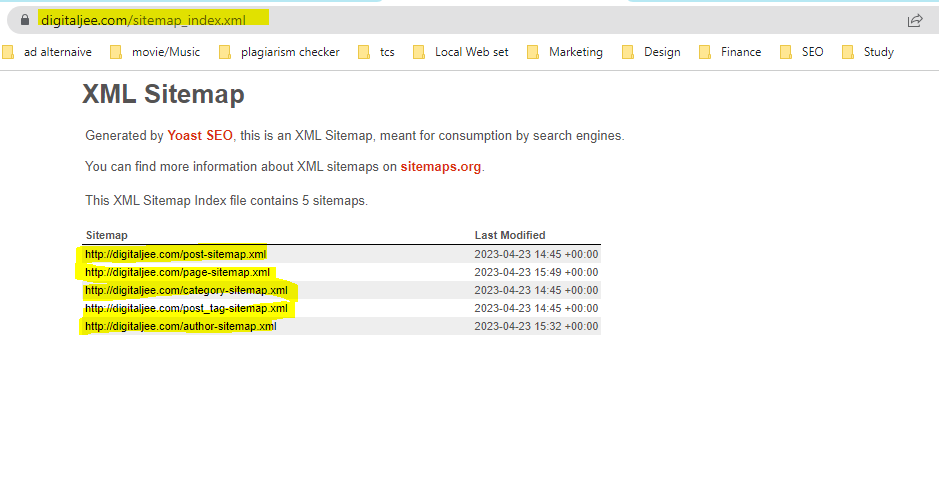
Before you can submit your sitemap to Google Search Console, you’ll need to know the URL of your sitemap. This can be found by going to your website’s XML sitemap page and copying the URL. We already see the steps of creating a sitemap above.
Step 4: Submit Your Sitemap to Google Search Console
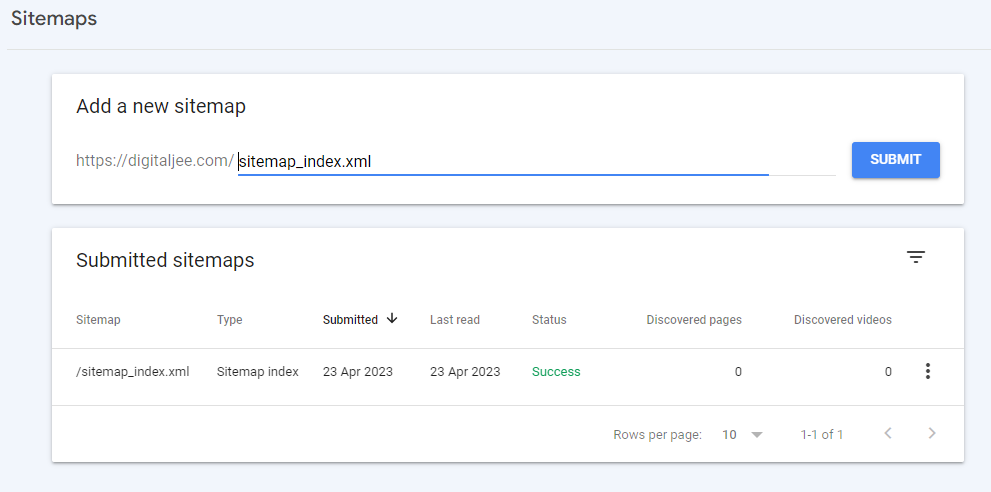
To submit your sitemap to Google Search Console click on the “Add/Test Sitemap” button, and then enter the URL of your sitemap. Click “Submit,” and Google will begin crawling your sitemap.
Step 5: Monitor Your Status
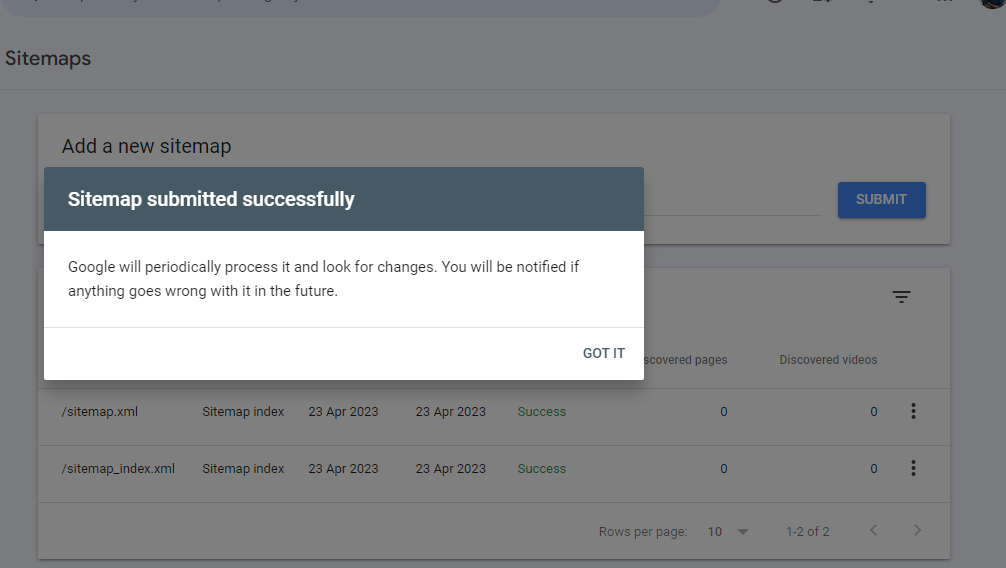
After submitting your sitemap, you can monitor its status in Google Search Console. This will allow you to see how many pages have been indexed. Further, you can also check any errors or warnings, and other useful information about your sitemaps.
Conclusion
Creating XML sitemaps using Yoast SEO is a quick and easy way to improve your website’s search engine optimization. By following the steps outlined above, you can create and submit it to search engines. Which can help you to improve your website’s visibility in search results.
Submitting your website’s sitemaps to Google Search Console is an important step in optimizing your website for search engines. By following the steps outlined above, you can easily add your sitemap to Google Search Console. And then you can monitor its status to ensure that your website is performing well in search results.